
Psychz - Steve
Votes: 0Posted On: Feb 01, 2019 05:19:45
Step 1.
Log into your cPanel account using the login details you have.
Step 2.
Once you have logged into your cPanel account, you will see multiple options on your dashboard.
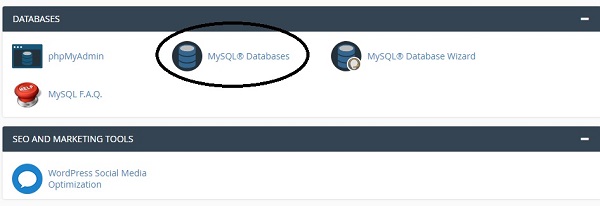
Go to 'Databases' and click on 'MYSQL Databases'.
Step 3.
Once you are inside the MYSQL Databases you will see an option to 'Create New Database' as shown below
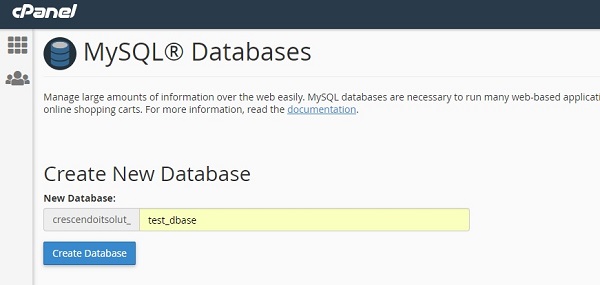
Let us create a test database and name it 'test_dbase'. Click on 'Create Database' to create the database.
Step 4.
Now go back to the main menu of the cPanel and click on 'PHPMyAdmin' under 'Databases' as shown below
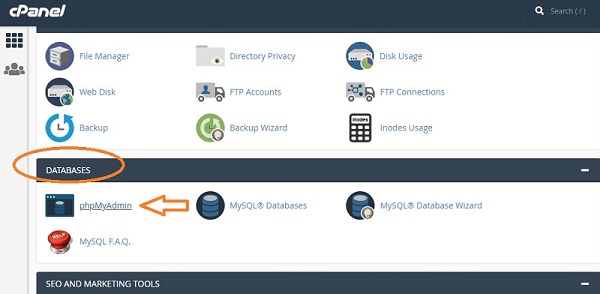
This will take you to page where you can see all the databases including the one we created named 'test_dbase'
Step 5.
Click on the database that we just created which would appear on the left-hand side of the screen.
For your reference, please see the arrow marked in the screenshot below
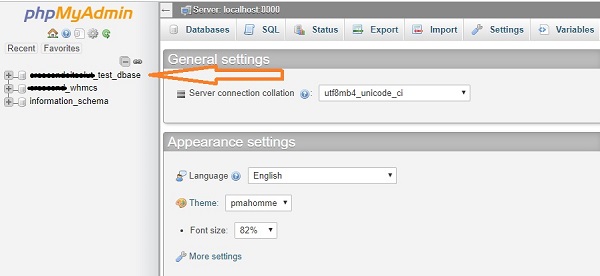
Once you do, you will see the option to create a table on the right hand side of the screen.
Step 6.
You can enter the name of the table that you want and the number of columns it will have.

Here, we have named the table as 'test_user' and allowed the number of columns to be '5'. Click on 'Go' button to create the table.
Step 7.
Alright, our table is now created. We need to enter the details that are going to go into the table.
Let the first column be User_Id which we will keep type as 'INT' because we want it to be purely a number. Here, I have defined the length of the number to be 4. You can choose as per your requirement. Lastly, you can allow the Index to be 'PRIMARY' since this is going to be a Unique key.
Please refer to the below screenshot for more details
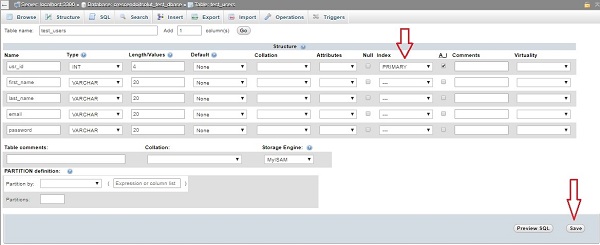
Similarly, you can input the details in rest of the columns as shown above. Click on 'Save' button to confirm your entries.
Voila!!! You have successfully created a MySQL table using PHPMyAdmin.